


Chocolate Fudge Cake
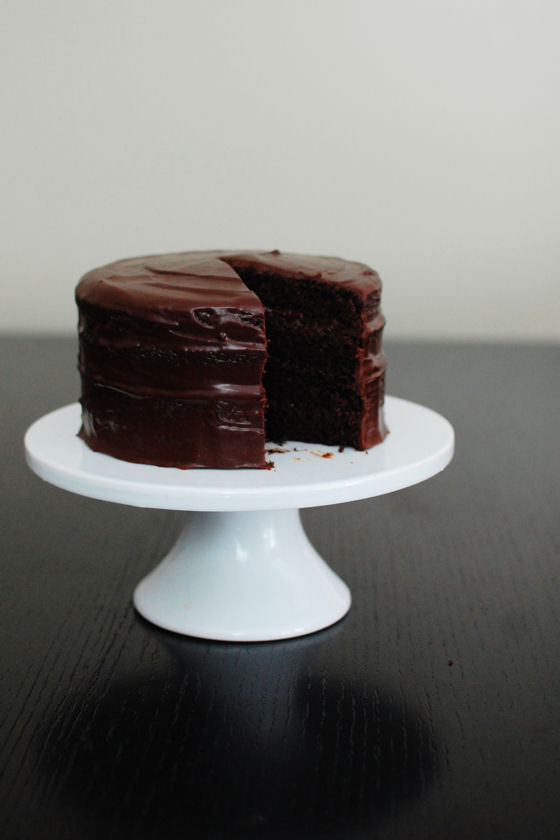
Sometimes the best things in life are the understated. Like this simple chocolate fudge cake with ganache filling and frosting. No fancy swirls or sprinkles or fillings. Just a good quality chocolate cake.
Today is my birthday, and like the cake, we’re keeping the celebration simple this year. We’re having some friends over for a cookout next weekend to celebrate. There will be some grilling, a game or two of bocci, and smores. I can’t wait for the upcoming opposite of an over-the-top party.
While this cake may seem understated, the flavors are rich and chocolatey, like a chocolate cake should be. Using a simple ganache to fill and frost the cake just adds to the decadence and keeps the cake extremely moist. With a simple candle, this would make any birthday boy or girl giddy with joy.
Three Years Ago: PB&J Omelet
Four Years Ago: Crockpot French Dip Sandwich


Chocolate Fudge Cake
Yield: Serves 12-14
Ingredients:
For the Cake
2 cups (14 ounces) sugar
2 cups (8 1/2 ounces) flour
2 Tbsp (3/8 ounce) cornstarch
3/4 cup (2 1/4 ounces) dark cocoa or Dutch-process cocoa
2 tsp baking powder
2 tsp espresso powder
1/2 tsp baking soda
1 tsp salt
4 eggs
3/4 cup (5 1/4 ounces) vegetable oil
2 tsp vanilla
1 1/4 cups (10 ounces) water
For the Filling
12 ounces semisweet chocolate
6 ounces cream (light, whipping, or heavy) or milk, or a combination
3 Tbsp Framboise
For the Frosting
8 ounces semisweet chocolate
4 ounces cream (light, whipping, or heavy)
Directions:
Preheat the oven to 350 degF. Lightly grease and flour two 8" x 2" round cake pans.
For the Cake
Whisk together the dry ingredients. Add the eggs, oil, and vanilla, beating until smooth. Gradually add the water, beating until smooth. Pour the batter into the prepared pans.
Bake the cakes for 35 to 38 minutes, or until a cake tester inserted into the center comes out clean. Cool the cakes in the pan for 15 minutes, then turn them out of the pans to cool completely on a rack.
For the Filling
Combine the chocolate and cream in a microwave-safe bowl, and heat until the cream is very hot, and the chocolate very soft. Stir to melt the chocolate completely, reheating very briefly if necessary. Stir in the Framboise (see KAF recipe for alternative flavoring options)
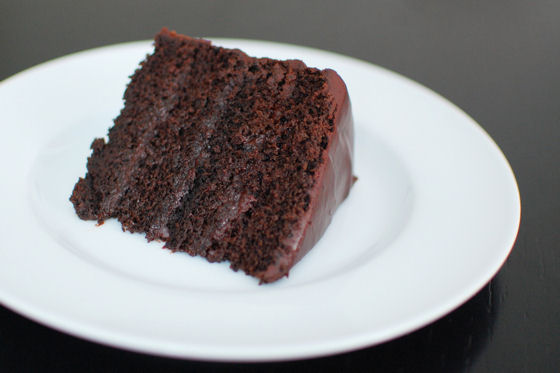
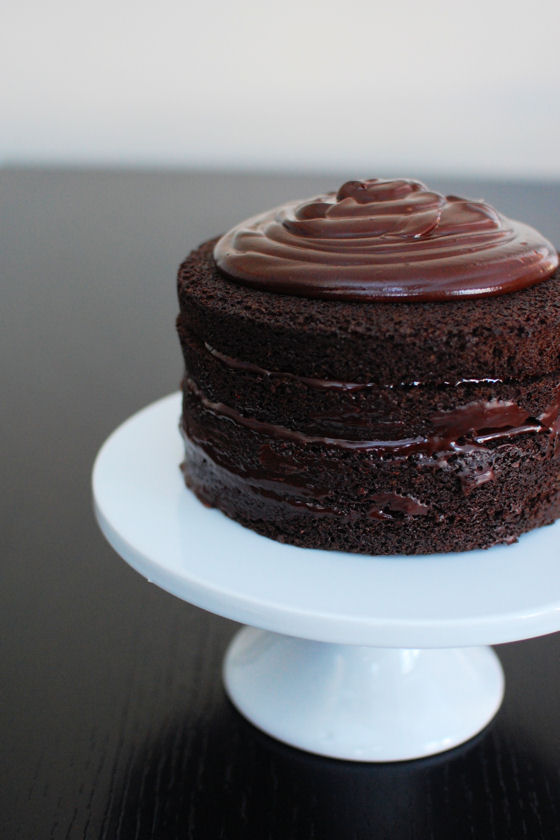
Divide the cooled layers in half horizontally, to make four layers. Place one layer on a serving plate, and spread with filling. Repeat with the next two layers. Top with the final cake layer.
For the Frosting
Combine the chocolate and cream in a microwave-safe bowl, and heat until the cream is very hot, and the chocolate very soft. Stir to melt the chocolate completely, reheating very briefly if necessary.
Pour and spread the icing over the top of the cake, letting it drip over the edges and down the sides. Once it’s done dripping, you may smooth the sides with an icing spatula, if desired.
Allow the cake to rest, covered with a cake cover until the chocolate is set; overnight is good, though several hours are sufficient.
Recipe from King Arthur Flour


 I am Jen the Beantown Baker. Engineer by day and baking maven by night. Hubby serves as my #1 fan and official taste tester. We got hitched back in 2006. Barefoot. In the sand. With the waves crashing behind us. It was one of the best decisions we’ve ever made.


How adorable!! So creative and I’m sure delicious too!
Those are SOOO cute!
Those may be the cutest cupcakes I’ve ever seen!
Oh my goodness! HOW CUTE! I seriously LOVe this idea! I’m so starring these to make! Thanks!
These are so adorable!!
Fabulous idea. I think your idea of the two shades of green was great too!
Cool! I love watermelon. These look like so much fun, kids would go crazy for these. 🙂
Beyond being probably the best looking summer cupcakes invented. I have to give props to the chef on the taste front as well. These were highly popular at said cookout and were demolished by all.
I love them! So creative!
Do I have to put in coffee? I can’t stand coffee at all.