


Pina-Colada cupcakes (with recipe)
My mother-in-law came to visit for her birthday a couple weekends ago. We had a great time with her in town and I got to show off my baking skills 🙂 I knew that she liked coconut cake but I wanted to kick it up a notch. I found a recipe for pina-colada cupcakes and thought they’d be perfect. I made a 1/2 batch which yielded 8 cupcakes for me.
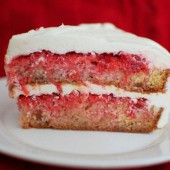
These turned out AMAZING. Hubby says they’re definitely in the top 3 cupcakes I’ve ever made. I would agree with that. They were so light and fluffy and the coconut and pineapple flavors blended together perfectly.
 Pina Colada Cupcakes – from Annie’s Eats
For the cupcakes (I halved this recipe to yield 8 cupcakes):
2 cups sifted cake flour
2 tsp. baking powder
1/4 tsp. salt
8 tbsp. unsalted butter, at room temperature
1 3/4 cups sugar
1/2 cup milk, at room temperature
1/2 tsp. vanilla extract
1/4 tsp. coconut extract
4 egg whites
1/2-2/3 cup shredded coconut
For the frosting (I halved this recipe which was perfect for my 8 cupcakes):
2/3 cup fresh pineapple chunks
8 oz. cream cheese, at room temperature
1 1/2 sticks unsalted butter, at room temperature
1 3/4 cups powdered sugar, sifted
For garnish:
shredded coconut
fresh pineapple wedges
Preheat oven to 350°. Line a muffin tin with paper liners.
In a medium bowl, sift together flour, baking powder and salt. Set aside.
In the bowl of an electric mixer fitted with the flat beater, beat the butter on high speed until creamy, about 30 seconds. Gradually add the granulated sugar and continue beating, occasionally scraping down the sides of the bowl, until light and fluffy, 4 to 5 minutes.
Reduce the speed to low and fold in the flour mixture in three additions, alternating with the milk and beginning and ending with the flour, until just blended. Stir in the vanilla and coconut extract. Stir in shredded coconut. Transfer batter to a large mixing bowl and set aside. Wash and thoroughly dry mixer bowl.
In the mixer bowl, beat egg whites until stiff peaks form. Using a rubber spatula, fold ½ cup of the egg whites into the batter until smooth. Carefully fold in the remaining egg whites until smooth and blended. Divide the batter among the prepared wells.
Bake until the cupcakes are golden and a toothpick inserted in the center comes out clean, about 15 minutes. Transfer the pan to a wire rack and let cool for 10 minutes. Remove the cupcakes from the pan and let cool on the rack to room temperature.
To make the frosting, puree the pineapple chunks in food processor or blender until smooth. In the bowl of an electric mixer, beat cream cheese and butter on high speed until light and fluffy, about 4 minutes. Mix in powdered sugar until well combined. Add pineapple puree to achieve desired pineapple flavor (approximately ½ cup). If frosting is too runny, refrigerate for 30 minutes to allow to set up a bit. Frost cupcakes with pineapple frosting, sprinkle with shredded coconut and garnish with fresh pineapple wedges.


 I am Jen the Beantown Baker. Engineer by day and baking maven by night. Hubby serves as my #1 fan and official taste tester. We got hitched back in 2006. Barefoot. In the sand. With the waves crashing behind us. It was one of the best decisions we’ve ever made.


Oh my! These look fabulous!!!
I love vegan chocolate cupcakes – and these look delicious. I can’t wait to try them!
These just made me so excited!!! They sound amazing and better yet…VEGAN! Thank you for posting this!
I saw these on Tastespotting and want to try, but — for the mousse what type of chocolate chips are you using? All of the ones I’ve seen in the store have milk fat in them. I’m new to vegan cooking, so maybe this is still non-dairy? My son is allergic which is why I’ve been trying many new vegan recipes!
Wow, those look over-the-moon good!
I’m totally making these tonight! I dont have the fancy caramel sauce, but hopefully they’ll still be edible with regular caramel. 🙂 Yum!
Jodi- Gihrardelli semisweet chocolate chips do not have any milkfat in them.
These look fantastic-I am allergic to dairy, and have been finding it sooo hard to sate my sweet tooth and not pay for it later.
They look fab! Thanks for sharing. I have included your site in our Vegan cupcake feature at http://www.partycupcakeideas.com