


4th of July Layered Cookie Cake
 I saw this recipe in my Google Reader and knew instantly that I would be making it soon. Since my family was going to be in town for the holiday and we all love cookie cakes, I had the perfect opportunity. And I would have the opportunity to use my flag plate which only comes out once a year.
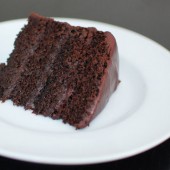
 My little sister and I made the cake and everyone LOVED it! The filling between layers was a perfect compliment to the chewy chocolatey cookie layers. We halved the recipe and it made about 12 servings. We made it with half chocolate chips and half M&Ms so that it was festive for the 4th of July. We had my little brother sort out a bag of M&Ms and just pull out the red and blue ones. What a great guy!
 Below, I am listing the halved recipe that I used. Please see original post for original recipe and her story about the cookie cake. We used a small flag and some festive cupcake decorations so spice up the look of the cake. The cookies were very moist and easy to cut through. I ended up only using about 3/4 of the filling and it worked out to be a good ratio of cookie to filling.
 Layered Cookie Cake – from Dozen Flours – originally from Martha Stewart Online
2 cups all-purpose flour
3/4 teaspoons baking soda
3/4 teaspoons salt
3 tablespoons unsalted butter, softened
3/4 cups packed light brown sugar
6 Tbsp granulated sugar
1 1/2 teaspoons pure vanilla extract
1 large egg, plus 1 egg yolk
6 Tbsp heavy cream
3/4 cups semisweet chocolate chips
3/4 cups red and blue M&Ms
If you have a Silpat mat: Trace an 6 1/2 inch circle on a piece of parchment paper using a marker. Place it face up on a cookie sheet. Place your Silpat mat face up on top of the parchment. You should be able to see the circle you drew peeking beneath the Silpat. If you don’t have a Silpat mat, flip the parchment paper face down on the cookie sheet.
Preheat oven to 350 degrees. Whisk flour, baking soda, and salt in a medium bowl. Put butter and brown and granulated sugars into mixer bowl and mix on medium until well combined (it will look very dry and not fluffy at all). Mix in vanilla, eggs, and yolks. Reduce speed to low. Add flour mixture in 2 batches, alternating with the cream. Stir in chocolate chips and M&Ms.
 Divide the batter evenly into 3 bowls. Drop batter onto center of baking sheet. Keep unbaked dough refrigerated while the other dough is baking. Using a small offset spatula, spread into a circle, using the drawing on the parchment paper, or as close as you can get it.
Bake for 10 minutes. Rotate cookie and reshape if necessary (mine did not need to be reshapen). Bake for 8-10 more minutes untile edges are golden brown. DO NOT OVER COOK! Remember you’re going to have to cut through all 3 cookies. Slightly under-cooked cookies is what you want. Transfer to wire rack; let cool. Can be stored airtight up to 1 day.
 Cream Cheese Filling2 8oz packages of full fat cream cheese, room temperature
1 teaspoons vanilla extract
1 cups confectioners’ sugar
Mix cream cheese, vanilla, and confectioners’ sugar in clean mixer bowl on medium-high speed until pale and fluffy. Divide in half spread onto 2 cookies. Stack cookies onto a cake board or platter, placing unfrosted cookie on top. Refrigerate until frosting is set, at least 20 minutes or overnight. Serve at room temperature.


 I am Jen the Beantown Baker. Engineer by day and baking maven by night. Hubby serves as my #1 fan and official taste tester. We got hitched back in 2006. Barefoot. In the sand. With the waves crashing behind us. It was one of the best decisions we’ve ever made.


This look absolutely FABULOUS! 🙂 I love oreo’s… They could quite possibly be my favorite snack food.! I’m defientely adding this recipe to my collection of cakes to bake! Thanks for sharing.
Megan♥
http://urbakinmecrazyy.blogspot.com/
that is one of the MOST impressive cakes I’ve ever seen! You always amaze me with your creativity! very inspirational.
OMG – I want!!! 😀
hi is it ok to use regular coffee?like maxwell?how many teaspoon of maxwell should i use?thanks
This looks AMAZING! What did you use to hold the Oreos in place on the top? Is that Oreo filling?
Love this cake – made it for my hubby’s 30th! Just a quick question as I had a little trouble with the Oreo filling. It was a bit thin. I think the problem might be the type of cream I used as we don’t have heavy cream in Australia (at least it’s not called heavy cream) so does anyone know what type of cream I should use? Thanks heaps 🙂
This cake turned out amazing! I omitted the coffee from the frosting and it was perfect without but im sure it would have been prefect with. It was a process to make it but well worth it! Just as good if not better than a bakery cake!
beantownbaker — December 24th, 2012 @ 5:48 pm
Yes, it’s definitely a lot of work, but worth the effort! Glad you enjoyed it.
Found you on Carole’s Chatter Food on Friday link-up. This cake looks like perfection!! I definitely need to try it soon:)
beantownbaker — June 10th, 2013 @ 12:33 pm
Thanks and welcome! You should definitely make this cake if you like Oreos at all.
OMG, I love oreo so much!!! I will try to make this cake someday! Thank you for the delicious recipe!
beantownbaker — July 22nd, 2013 @ 1:13 pm
It definitely takes a little bit of extra effort, but it’s so worth it!
What size pkg of Oreos? I just came home with one that only has 3 rows, ugh? It’s 14.3 oz. is that the same size? Thanks!!
beantownbaker — September 2nd, 2014 @ 7:09 pm
Did that work for you? I will have to check next time I am at the store. I just get the standard size with 3 rows.
Just wanted you to know that after all these years I keep coming back to this recipe
!! My 17 year old requested it for his birthday, he was 4 the first time I made it for his birthday.