Vanilla Peach Bourbon Jam

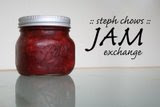
I decided to try my hand at something new. I wanted to step outside my comfort zone and do something I’ve never done. That’s what inspired me to join steph chows Jam Exchange. The concept is simple. Everyone who signs up will make 2 pints of jam and send it to someone else. What a great way to try new things!
I started looking for jam recipes that sounded good. Hubby’s mom’s boyfriend, J, had given us some of his famous peach jam for Christmas last year, so that was my first thought (he also made the wonderful strawberry jam that I used in my Harry Potter Cupcakes). I didn’t want to try to compete with his peach jam, so I was looking for a recipe with a twist. This recipe definitely has the twist I was looking for. It adds bourbon and vanilla bean to a simple peach jam.
I finally rounded up all my supplies and set off to make jam. Man did I dirty a lot of pots and pans in this process. It’s not too difficult, even without all the proper supplies. I’ve marked up the recipe below to reflect what I did. I was really worried that my jars didn’t seal properly because they were just sitting on the bottom of my big stock pot instead of on a rack which would allow the boiling water to be around them completely, but as they were cooling, I heard them pop one at a time.
So how is it? Well the day after I made it, Hubby ate peach jam in a bowl for dessert. And we had cupcakes in the house. It’s basically awesome and we agreed we like it better than J’s famous peach jam (sorry J). I love the specks from the vanilla bean and it has just a very subtle bourbon flavor. I highly recommend this recipe to anyone looking for a peach jam recipe. And some lucky food blogger is going to get a jar of mine!
Don’t forget to enter in my 2nd blogiversary giveaway by midnight on August 13th!

Vanilla Peach Bourbon Jam
Yield: ~7 8oz jars
Ingredients:
1 package low sugar pectin - I used Sure-Jell for less or no sugar needed recipes (the pink box)
3.5 pounds peaches - this was 9 peaches for me, I just weighed them at the store
4.5 cups sugar (check the pectin package for exact measurements--the instructions differ slightly depending on the brand of pectin). - I used 3 cups sugar because the peach jam recipe that came with my pectin said 3 cups
1/4 cup lime juice
1 vanilla bean, cut in 1/2 lengthwise then cut into 1 inch pieces
1/4 cup bourbon
1 tsp almond extract
Directions:
Before you begin this recipe either wash jars in the dishwasher on the extra hot water cycle, or wash them with hot soapy water and boil them for 10 minutes, leaving them on dry or in the boiling water until you need them for your jam. This sterilizes the jar and lengthens the shelf life of your jam. I just ran them through the dishwasher on the hot cycle.
Blanch the peaches in boiling water for 30 seconds, (then submerse in an ice bath) then slip off the skins. Chop the peaches into 1/4 inch dice, removing the pits.
Put the peaches, sugar, lime juice, and vanilla bean into a large non-reactive pot (stainless is good). Mash the peaches with a potato masher, until they are your desired consistency. Stir until the sugar is dissolved. The sugar was completely dissolved by the time the mashing was done. Next time, I think I'd mash as I added peaches to the pot instead of waiting until the end. It wasn't easy to do.
Over medium-high heat and bring the peach mixture to a rolling boil, stirring frequently to prevent scorching. Boil for 1 minute, then add the pectin. Bring the jam to a rolling boil once more, stirring constantly, and boil exactly 1 minute.
Remove the jam from heat. Stir in the bourbon and extract, remove vanilla pods, ladle the hot jam into jars, and screw on the lids. Then set the jars on a rack in a large pot of boiling water--the water should be 1 inch above the jar tops. I just used my big pot stock and put the jars in, made sure they were under an inch of water and turned it on high.
Bring the water to a gentle boil and boil the jars for 10 minutes. Then remove the jars from the hot water and set aside to cool.
When the jam is cold, check the seals on the jars by pressing on the centers of the lids. If the lids do not spring back, they are vacuum sealed and the jam can be stored at room temperature. Another way to check is to remove the ring and try to lift the lid. If it lifts up, it wasn't sealed properly. I read that you can reprocess jars at that point, but off of mine were sealed. If the lid flexes, there is no seal, so store the jar in the freezer or refrigerator instead.


 I am Jen the Beantown Baker. Engineer by day and baking maven by night. Hubby serves as my #1 fan and official taste tester. We got hitched back in 2006. Barefoot. In the sand. With the waves crashing behind us. It was one of the best decisions we’ve ever made.


