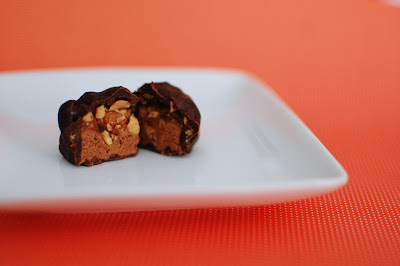
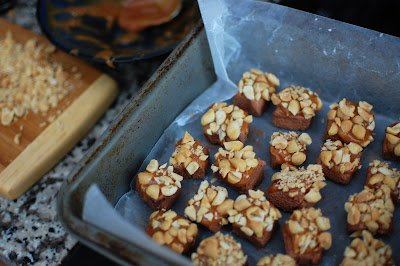
Homemade Snickers Candy Bars
For those of you who know me in real life, you may remember a Facebook post claiming that I was looking for a new Official Taste Tester for my blog…
You see, Hubby’s lack of excitement about candy does lead to some issues. When I presented him with one of these guys, he said it was good and went on about his business. I asked him what it tasted like. He said I dunno chocolate and caramel and peanuts.
Of course, the correct answer is a Snickers bar, but Hubby didn’t think of that. He had to GOOGLE it to save his title as Official Taste Tester. It was a sad day in the Beantown Baker household.
As I’m sure you all figured out, once I decided to make the Three Musketeer’s bars, I decided to also make the Milky Way bars and the Snickers bars. I figured I was the majority of the way there so why not. These were by far my favorite. But that’s no surprise, because if I were to choose a candy bar of those three, it would be a Snickers bar without a doubt.
One Year Ago: Marshmallow Fondant on Chocolate Cupcakes
Two Years Ago: Pink Cupcake Bites

Homemade Snickers Candy Bars
Ingredients:
2 cups semi-sweet chocolate chips
1 (8 oz.) tub frozen whipped topping, thawed
Kraft caramels, unwrapped
Roasted peanuts, chopped
2 cups milk chocolate chips
2 tablespoons vegetable oil
Directions:
Line an 8 or 9-inch square pan with wax paper.
In a medium bowl, melt semi-sweet chocolate chips in the microwave at fifty percent power, or use a double boiler.
Using an electric mixer on high speed, beat melted chocolate for about 30 seconds.
Add whipped topping to melted chocolate and beat until well combined and fluffy, 30-60 seconds more.
Spread chocolate mixture evenly into prepared pan (if mixture is too stiff, press into pan with lightly dampened hands). Place in freezer for 30 minutes.
Remove pan from freezer and turn chocolate mixture onto a cutting board; cut into one-inch squares. Return squares to freezer for another 15-20 minutes.
Melt the caramels according to package instructions (or make your own!). Allow caramel to cool slightly. Spread a small amount of caramel on top of each square of the chocolate mixture.
Dip caramel covered end of the square into chopped peanuts. Return squares to freezer for 20 minutes.
Meanwhile, melt milk chocolate chips with 2 tablespoons of vegetable oil and stir until well combined. Dip frozen chocolate squares into melted chocolate to coat. Place on wax paper to set. Keep chocolates in an airtight container in the refrigerator.
Recipe adapted from Let's Dish

Don’t forget about my Power of Pink Challenge – make something PINK by the end of the month to raise Breast Cancer Awareness!


 I am Jen the Beantown Baker. Engineer by day and baking maven by night. Hubby serves as my #1 fan and official taste tester. We got hitched back in 2006. Barefoot. In the sand. With the waves crashing behind us. It was one of the best decisions we’ve ever made.


I can’t wait to try these! I hope you’re doing well!
Vegan cookies huh? And sugar-free? Wow, they look good!
like truffles or fudge, huh? I’ll take one!
or 5 🙂
I love cookie exchanges too! I actually participated in Steph’s exchange too 🙂 These cookies sound delicious and if they’re vegan they’re supposed to be healthy right??
ooo these sound amazing for the exchange! Sorry it was a challenge to find a recipe but I’m so glad you found one you liked!!
These cookies look amazing. I mean they contain chocolate, rum, plus they are sugar-free. This is the perfect dessert. Thanks for sharing.
WOW – this cookie could not look more delicious 🙂
How are these sugar free with maple syurp in them that has lots of sugar
How many cookies does this make in one batch?
beantownbaker — December 17th, 2013 @ 10:56 am
If I remember correctly, it made ~2 dozen cookies.
Normally, I don’t like Oreo flavor. But this cake make me hungry.